How to Turn an AI-Generated Story into a Printable PDF Book
From a one-line prompt to a book you can hold: generate the story, lay out the pages, and build one printable PDF without uploading a thing.
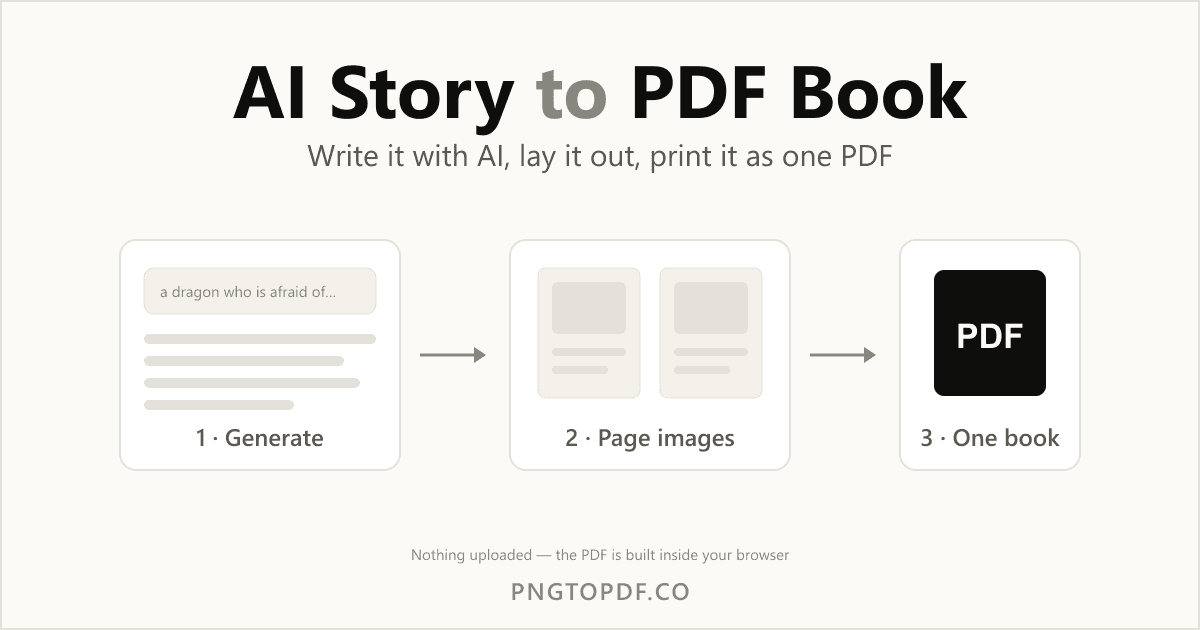
An AI story generator can hand you a finished bedtime story in about thirty seconds. What it cannot hand you is a book — something with a cover, ordered pages, and a fixed layout that comes out the same on your printer, at the copy shop, and on a grandparent's tablet. That last mile is a PDF, and it takes about ten minutes.
This guide walks the whole path: writing the story, turning it into pages, building a single PDF without uploading anything, and finishing it with page numbers, a cover, and a file size you can actually email. It also covers the parts most tutorials skip — page sizes, print margins, and what the copyright situation really looks like.
What you can actually make this way
The pipeline below is deliberately simple — text, then pages, then one PDF — and it covers most of what people want out of an AI story:
- A personalised bedtime book. Your child as the main character, printed and stapled, read at bedtime for the next two years.
- Classroom readers. A short story at a controlled reading level, printed as a class set, or handed out as a PDF that opens on any school device.
- A bilingual reader. The same story in two languages, one per page, for a language learner.
- A gift or keepsake. A story about a family trip or a pet, laid out with photos, printed once and given away.
- A pitch or sample chapter. A draft you want to send to someone as a document rather than as a wall of chat transcript.
Step 1 — Write the story
Start with the text, not the layout. A free tool like Story-AI turns a one-line prompt into a complete story in seconds, and lets you set the genre, length, and tone before it writes. It also has separate generators for story ideas, plots, and characters, plus stories with images and a bilingual reader — useful here, because the illustrated and two-language versions are exactly the ones worth turning into a printed book.
Two things to get right at this stage, because fixing them later means redoing the layout:
- Ask for the story in scenes. Add something like "split it into 12 short scenes, each 2–3 sentences" to the prompt. Twelve scenes become twelve pages. Without this you get flowing prose and have to chop it up by hand.
- Read it before you lay it out. Generated stories drift — a character's name changes halfway through, or the ending arrives too fast. Fix the text while it is still just text.
Step 2 — Turn the story into pages
A PDF page is a fixed rectangle, so decide the shape now. A4 or US Letter if you will print at home or at a copy shop — that is what their paper trays hold. A square format looks more like a real picture book but generally means a print-on-demand service. Whatever you choose, set it once and lay everything out to it.
You do not need professional software. Any of these works:
- Slides. Google Slides, Keynote, or PowerPoint. Set the slide size to your page size, one scene per slide, then export as images or straight to PDF.
- Canva or a similar design tool. Best when you want an illustration and text composed together on the same page.
- A word processor. Fine for a text-only chapter book, less good when every page carries a picture.
- Images only. If your story already comes with generated illustrations, drop the picture files straight into the converter and skip layout entirely.
Export each finished page as an image. PNG for pages that are mostly text, line art, or flat colour — it is lossless, so letters stay crisp. JPG for photographic pages, where it produces a much smaller file. Our PNG vs PDF explainer covers the difference in more depth. Name the files so they sort in reading order — 01.png, 02.png, 03.png — and future-you will be grateful.
Step 3 — Build one PDF, without uploading anything
Now turn the pile of page images into a single document. This is where a browser-based converter beats a cloud service: a manuscript, a child's name, and family photos are not things you want sitting on someone else's server. Our converters run entirely inside your browser tab — the pages never leave your device.
- 1Open the converterGo to pngtopdf.co for PNG pages, or pngtopdf.co/jpg-to-pdf for JPG pages. Nothing to install, no account.
- 2Add every page at onceDrag the whole folder in — up to 50 images per batch, plenty for a picture book. Thumbnails appear immediately.
- 3Put the pages in orderDrag the thumbnails until the sequence is right. What you see on screen is the page order in the finished PDF. Rotate any page that came out sideways.
- 4Set page size and marginPick A4 or Letter and choose a margin. “Fit” keeps each page image whole; a small margin gives the printer something to grip.
- 5Convert and downloadKeep “combine into one PDF” on so all the scenes become one book, then download. No watermark, no sign-up.
If your pages are already PDFs
Exported a cover from one tool and the story pages from another? Join them with PDF merge instead — same idea, same privacy, and the step-by-step is in how to merge PDF files.
Step 4 — Finish the book
A few small touches are the difference between "a stack of images" and something that reads like a book:
- Page numbers. Run the file through add page numbers and skip the cover so numbering starts on the first story page.
- A cover and a title page. Make them as two more images and put them first, or merge them in afterwards.
- The right print size. If you laid out at the wrong size, resize the PDF to A4 or Letter rather than re-exporting everything.
- A smaller file to share. Illustrated books get heavy — compress the PDF for email and keep the full-size original for printing. Our guide on making a smaller PDF from images explains where the weight actually comes from.
- A draft marking. Sending it around for feedback? A watermark saves you from someone printing the wrong version.
Printing it: what to check first
Home printers cannot print to the very edge of the paper. If your illustrations run to the edge, expect a white border of roughly 5 mm on each side, or a slight crop if you tick "fit to page". Design with a comfortable margin and this never becomes a problem.
For a folded booklet, most print dialogs have a booklet or 2-up layout that reorders the pages for you — that works best when the page count is a multiple of four, so pad the end with a blank page or a "the end" page if you need to. And print one copy before you print thirty; colours on paper are always duller than colours on screen.
The honest limits
Worth knowing before you invest an evening in this:
- Generated stories need an editor. The structure is usually sound, the sentences are usually competent, and the details are sometimes wrong. Read every page.
- Illustration style drifts. Images generated one at a time rarely keep a character looking the same across twelve pages. Describing the character identically in every prompt helps; it does not fully solve it.
- Publishing rules vary. In the US, purely machine-generated text generally cannot be registered for copyright, though your own edits and arrangement can be; other countries differ, and print-on-demand platforms have their own AI-disclosure policies. Check before you sell.
- A PDF is a fixed layout, not an ebook. It prints beautifully and it reflows not at all. If the destination is a Kindle, EPUB is the better target.
Frequently asked questions
What is the easiest way to turn an AI-generated story into a PDF?
Generate the story text first, lay each scene out as a page (a slide, a document page, or an illustrated image), export those pages as PNG or JPG images, then drop them into a browser-based image-to-PDF converter like pngtopdf.co and download one combined file. Nothing is uploaded and no account is needed.
Do I need Photoshop or InDesign to make a small picture book?
No. For a 12-to-24 page story book, Google Slides, Keynote, PowerPoint, or Canva is enough — set the slide size to your page size, put one scene per slide, and export the slides as images or as a PDF. Full layout software only starts to pay off at book-length projects.
Are my story pages uploaded when I build the PDF online?
That depends on the tool. Most online converters send your files to a server and promise to delete them later. pngtopdf.co runs entirely in your browser, so the pages never leave your device — which matters if the book has a child’s name, family photos, or an unpublished manuscript in it.
How do I add page numbers to a story book PDF?
Build the PDF first, then run it through pngtopdf.co/add-page-numbers. You can choose the position and skip the cover so numbering starts on the first story page rather than on the title page.
My illustrated PDF is huge. How do I make it small enough to email?
Image-heavy books get large fast. Compress the finished file at pngtopdf.co/pdf-compress, or re-export the page images at a lower quality before converting. Keep the uncompressed version for printing and send the compressed one by email.
Can I sell or publish a book written by an AI story generator?
Rules differ by country and by platform, and they keep changing. In the US, purely machine-generated text generally cannot be registered for copyright, while your own edits, selection, and arrangement can be. Print-on-demand marketplaces also have their own AI-disclosure policies. Check the current terms of the platform you plan to publish on before you sell anything.
What page size should I use for a printed story book?
A4 or US Letter if you are printing at home or at a copy shop, because that is what their paper trays hold. Square formats such as 8×8 inches look more like a picture book but usually mean a print-on-demand service. Decide the size before you lay out the pages — changing it later reflows everything.
How do I make a two-language version for a bilingual reader?
Lay out each scene twice — one page per language — or put both languages on the same page with the translation in a smaller size underneath. Generate the pages in both languages first, keep them in matching order, and the page order in the converter becomes the page order in the book.
The bottom line
The writing is the fast part now. Generate the story in scenes with a tool like Story-AI, lay each scene out as a page, export the pages as images, and combine them into one PDF at pngtopdf.co — free, no account, and with the pages kept entirely on your own device. Add page numbers, compress a copy for email, and print the original.
From a prompt to a book you can hold, in an evening.